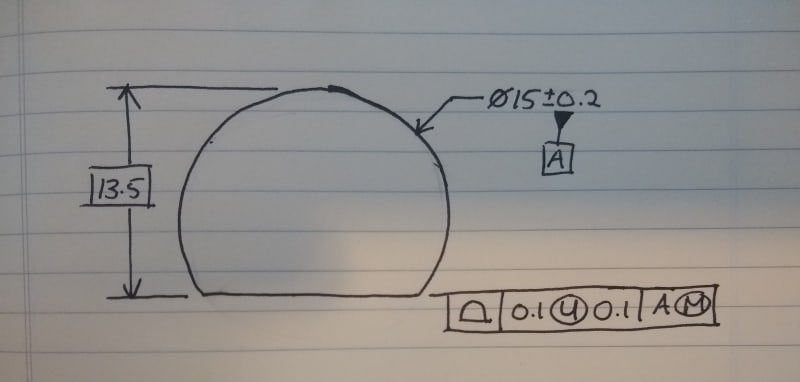
Tarator,
There are places where the standard is unclear and can be subject to more than one interpretation and extensions, and there are places where the standard is crystal clear and there should be no personal interpretations. Otherwise, we don't need the standard and everyone is free to put on their drawings whatever they want and then engage in endless debates and arguments over what drawings mean. I tried to encourage you to investigate and find out yourself that the Y14.5 standard clearly specifies that a true profile of a feature is defined either by basic dimensions or by the CAD model (where there is an appropriate note on the drawing and no other specification):
"A true profile is a profile defined by basic radii, basic angular dimensions, basic coordinate dimensions, basic size
dimensions, undimensioned drawings, formulas, or mathematical data, including design models." - para. 8.2 in the 2009 version.
Note that nominal values of +/- dimensions are not part of it.
If you don't care about what the standard has to say think of the person who will put the 13.5 basic from the edge of the cylinder on his drawing with the 15+/-0.2 diameter datum feature, thinking it means the same thing as 6 basic from the datum axis, and eventually will end up arguing with a vendor that will be saying that parts that were produced out of tolerance when checked to the DRF are in spec, and as proof will be showing how he measures the distance from the edge of the cylinder to the flat, getting the right numbers.


