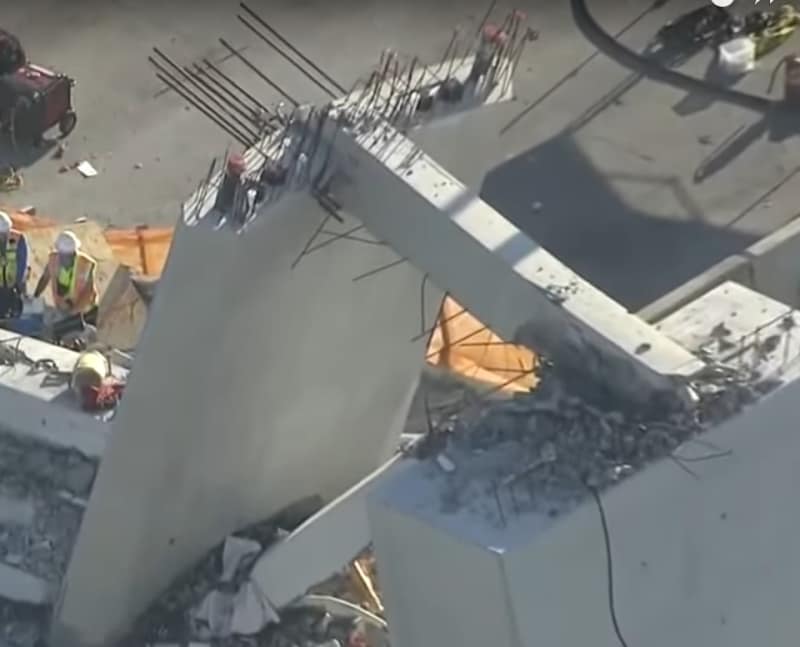
Further details of the 11-12-Deck connection area, (which has become of interest here, though not to argue that other areas are ruled out, particularly the junction of 10, 11 and canopy).
From videos posted at:
which was mentioned in this forum by jrs87 -- thanks.
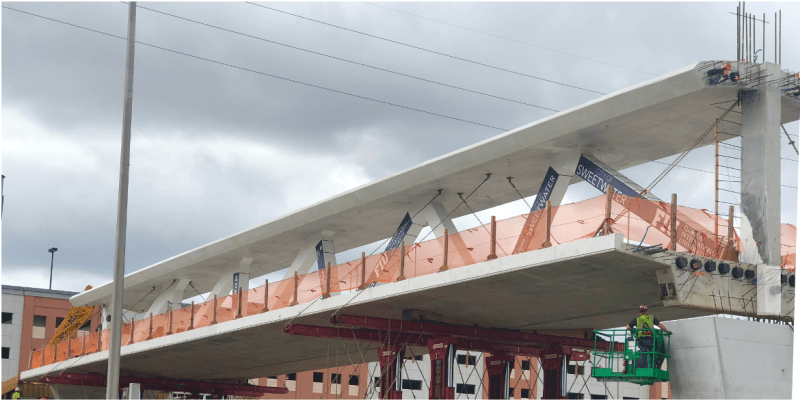
A couple of images from the bridge shortly before move.
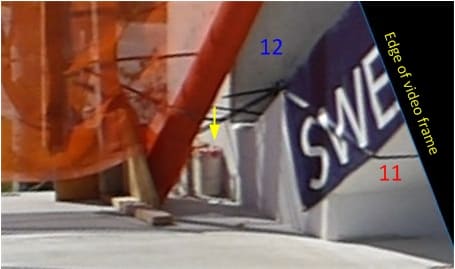
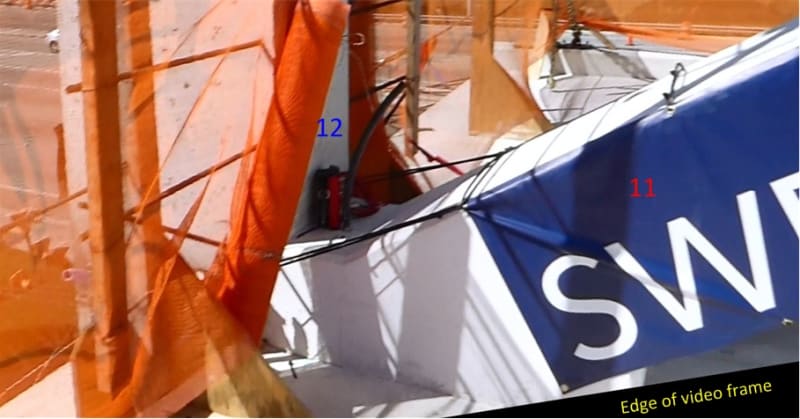
Main point of interest: the approach of #11 to #12, and to the deck. Note the "fillets" between #11 and #12, and between #11 and deck, which I had not previously noticed. A yellow arrow indicates white pipe with red tape or paint on rim that correlates to a later image.
The area pictured above corresponds to the area captured from the NTSB B-roll footage, which I previously posted, wondering the function of the rods marked with yellow "?". These rods are enclosed in white plastic pipes; the one on the near side bears red tape/paint:
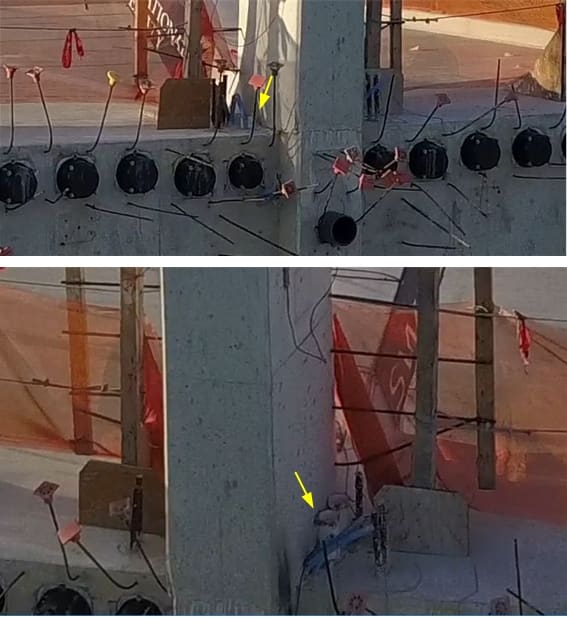
I had previously thought that these rods and their enclosing pipes were within the footprint of #12, but apparently, from pictures above and below, they are just outboard. I also thought that the other pipe on each side was perhaps part of services to be supplied up inside #12, perhaps along with additional channels in the void between the pipes. However, to me it now looks like the void between these pipes is simply where the base of #12 tore out at some stage in the collapse, leaving connecting rebar bent over to the extreme left of the picture.
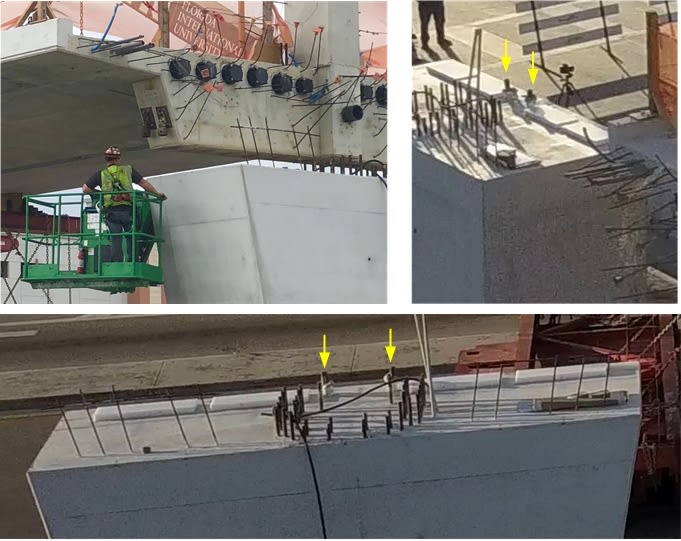
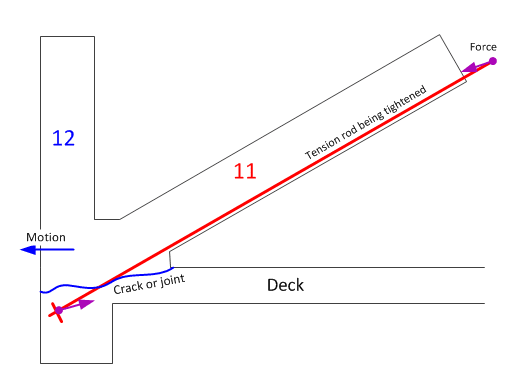
Steve Nuchia suggested these rods might be for position keeping. I think the following images show that the rods indeed tie the bridge to the pier, though they are not in the position shown on the proposal drawings, but have moved inboard. I'm thinking that the protrusions seen on the pier were extended in some way after positioning the span, so as to stick up through the deck's end-beam and out of the white pipes on each side of #12. These images are from drone footage during the move.
I imagine at some point we'll get to see photos of the cracks that were reported, and see whether they are in the 11-12-deck neighborhood.