Tek-Tips is the largest IT community on the Internet today!

Members share and learn making Tek-Tips Forums the best source of peer-reviewed technical information on the Internet!

  • Congratulations cowski on being selected by the Eng-Tips community for having the most helpful posts in the forums last week. Way to Go!

How to customize balloons?

  • Thread starter Thread starter CADFab
  • Start date Start date
C

CADFab

Guest
I want to whether there is a way to have both qty and part number in one balloon that is not a circle. We use the line style of balloon and would like to have both qty and part number because we do not have BOM's on details. Any help would be great full.
 
Insert balloon, right click balloon & select 'Edit balloon style'.
In style dialogue window 'Balloon formatting', 'Shape', select circular, 2 entries. This defaults to 'Item' & 'Quantity'.
 
  • First change your balloon style property display by selecting Format > Standards, select balloon style [Balloon (ANSI) for example] and change your balloon Formatting > Property Display to show QTY and Part Number. Save your style changes.
  • Create a sketched symbol in the (non circular) desired shape you wish and save it.
  • Place a balloon on a part.
  • Right Mouse Click on the balloon > Select Edit Balloon
  • Under Balloon Type check the Override Shape (by Style) check box, depress the User Defined Symbol button and browse to the sketched symbol you created in step #2 and select ok.
 
Balloon Formatting

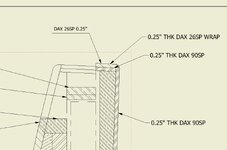
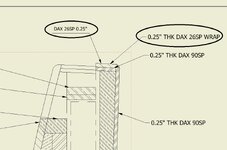
I did as directed below. My question is how do I get the leader and text circled on the left to look like the leader and text circled on the right?View attachment 861


  • First change your balloon style property display by selecting Format > Standards, select balloon style [Balloon (ANSI) for example] and change your balloon Formatting > Property Display to show QTY and Part Number. Save your style changes.
  • Create a sketched symbol in the (non circular) desired shape you wish and save it.
  • Place a balloon on a part.
  • Right Mouse Click on the balloon > Select Edit Balloon
  • Under Balloon Type check the Override Shape (by Style) check box, depress the User Defined Symbol button and browse to the sketched symbol you created in step #2 and select ok.
 

Attachments

  • DAX 26 SP.jpg
    DAX 26 SP.jpg
    123.1 KB · Views: 9
  • DAX 26 SP.jpg
    DAX 26 SP.jpg
    137.9 KB · Views: 7
Last edited:

Part and Inventory Search

Sponsor

Back
Top