Max size fillet weld in T joint.
(OP)
As the design engineer I have specified the attached detail and received the following comment from the welding inspector on this California project. "This (the 5/16" fillet) is not achievable. Recommended a 1/2" plate with 3/8" weld."
My understanding (2.7.1.1 in my very old AWS D1.1) is that on "lap welds" for base metal over 1/4" the fillet cannot exceed thickness - 1/16". Given the 3/8" plate and angle the minimum size would be 5/16" if this was a lap. Would a "T" joint have more stringent limits than a lap weld?
Has the code changed?
RE: Max size fillet weld in T joint.
But thumb rules are not design requirements.
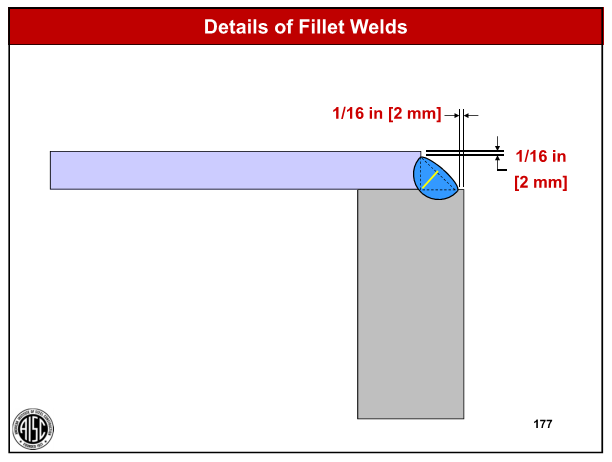
Leaving a small (but visible) 1/16 "edge" to the original steel of a fillet weld means that the welder does not "gob" metal at the corner, does not melt the corner over and allows a very specific "do not exceed" limit to the weld size. Thus, the edge of the metal is not melted. You can design the weld joint joint any way that can be accurately fabricated. But the single sided 45 degree usual fillet weld itself will never have more strength than the thickness of the thinner of the two original metals.
RE: Max size fillet weld in T joint.
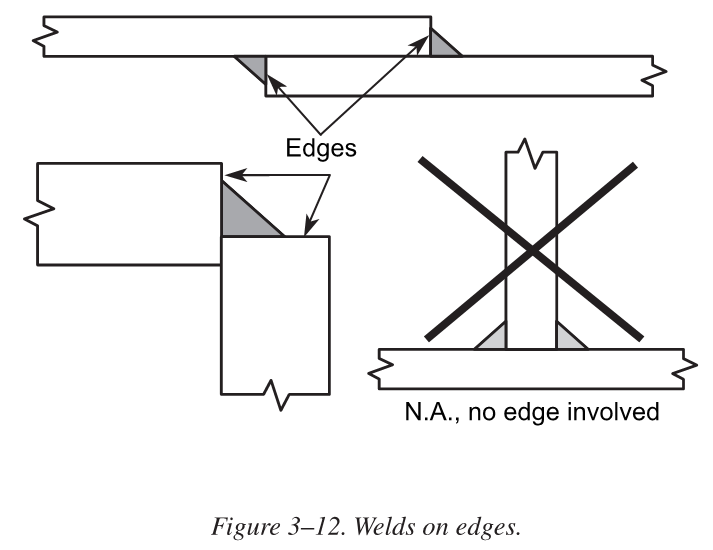
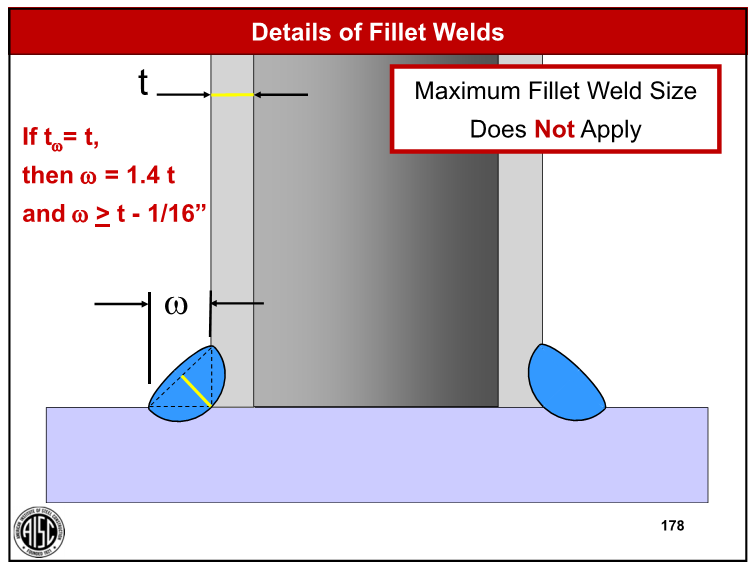
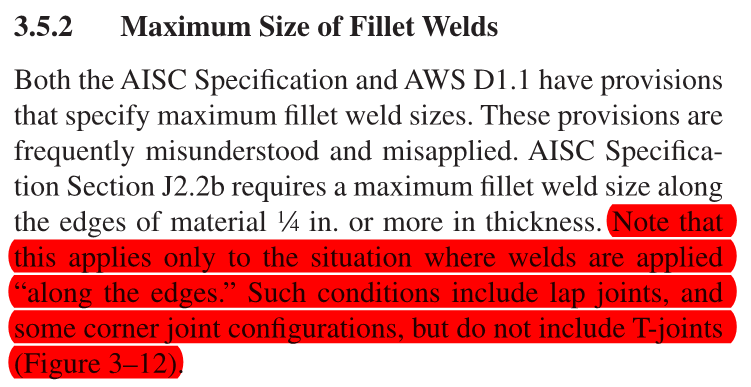
The max fillet weld rules are for 'edges' - for the reasons that racookpe1978 described.
For a T-joint the are no 'edges', just 'surfaces'.
From AISC's DG#21 'Weld connections - A Primer for Engineers'
From Duane Miller's recent AISC webinar on Welding:
RE: Max size fillet weld in T joint.
the following "rules of thumb" can be used for T-joints:
A) for plates, welded from both sides:
- throat thickness (not to be confused with leg length) should be max. 0.46 and 0.48 of plate thickness for S235 and S275; and max. .55 for S355
- much less for stainless steels
B) for HSS, welded all around (only on the outside):
- S235: throat thickness should be max. 2* .46 ( = .92) of the wall thickness
- S275: 2* .57
- S355: 2* .60
I have annexed a document in Dutch, that describes the background of this.
I haven't got round to translate it into English, but either way it's mostly tables and calcs, so should be worth looking into it anyway.
http://www.fusionpoint.be
http://be.linkedin.com/in/fusionpoint
RE: Max size fillet weld in T joint.
Back when I was an instructor for the AWS CWI program I would cover the size limitations of the lap joint and immediately project a sketch of a T-joint and ask the class what the maximum fillet weld size was when the plates were 1/2 inch thick. 75% of the attendees would respond with 7/16 inch. One or two people would raise their hand to tell me the sketch was a T-joint, so the maximum size limitation didn't apply.
I've often said, the CWI separates those that can read and understand English from those that read English.
Best regards - Al
RE: Max size fillet weld in T joint.
Why would it NOT apply to corner joints?
RE: Max size fillet weld in T joint.
I do not recollect that the AISC Steel Construction Manual has imposed additional restrictions on the size of a fillet for other applications. A design guide, and there are many available to the designer, is not a code. Whether an designer wants to impose additional restrictions based on personal preference is just that, a personal preference.
A code, whether it is AWS D1.1 or ASME Code Section, lists the minimum requirements applicable to specific types of applications, i.e., buildings, bridges, boilers, etc.. The designer should incorporate any additional restrictions that may be of benefit or will enhance the serviceability of the structure. However, those additional restrictions are personal preferences based on experience and sound engineering judgement. Still, there is a difference between code requirements and engineering judgement.
There are applications were a full fillet weld is needed along the edge of the joint. The general consensus is that the relief along the edge is simply to allow someone to verification a proper size fillet is achieved. There are other ways to ensure the full size fillet is present. One means is to place a reference mark 1/2 inch or 1 inch back from the original edge so the edge of the part can be reestablished for the purpose of measuring the size of the fillet weld. Certain military standards actually require a scribe line placed a specified distance from the edge for that very purpose.
Best regards - Al