Tek-Tips is the largest IT community on the Internet today!

Members share and learn making Tek-Tips Forums the best source of peer-reviewed technical information on the Internet!

  • Congratulations MintJulep on being selected by the Eng-Tips community for having the most helpful posts in the forums last week. Way to Go!

Patterns using curves - need advice

  • Thread starter Thread starter rude
  • Start date Start date
puppet used a Variable section Sweep for the cut. It looks like you have not done so. Go thru his post once again.
 
I've tried this on a helical curve, and it doesn't seem to work


I've generated the Curve from an equation and cylindrical co ordinate system and it just seems to have stopped me selecting the curves (I've tried internally generated and externally generated, and neither show up on screen).


Any clues?


-AS
Edited by: andysuth
 
hey Andy,
Could u post a picture?
 
Sure,


Here's the layer tree.


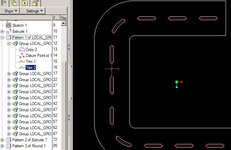
As you can see, nothing is hidden in there. Not sure showing a picture of the actual model would be of use, it's the first feature in the model, so you'll see some datum planes, co ordinate systems and a blank screen.


-AS


View attachment 4037
 
As you can see Feature 9 IS HIDDEN.
 
So it is. It is also just a random feature, not feature 7 which is the helix datum curve.


Feature 9 is probably an old feature that resembled a curve, so I had it hidden so it did not confuse the matter.


But I've here shown a layer tree with the hidden layer indeed showing nothing hidden.


-AS


View attachment 4053
Edited by: andysuth
 
The issue of doing datum points along the datum curve has been solved previously, but thanks for input.


Still love to know why I can't see my helix datum curve though.


-AS
 
Hey, please tell me how to creat the cut in pupet 's picture by VSS !I can'timagine ..


Thanks a ton !
smiley9.gif
 
No need for VSS

If you create an approximate or exact geometry curve copy of the pattern path sketch, you will get a single curve entity not lines and arcs this will reduce problems with this type of pattern.

I originally tried offsetting this to get a use edge reference for an extrude feature but this gave to many regen and constraint problems. Therefore I used the patterned points on the curve reference to do two split commands to remove the portion of the curve before the first point and after the second. Then I created a thin cut feature using the both sides option and the split curve as the Use Edge reference. This created a rectangular slot of the proper slot width. I patterned the Ref Features with a group pattern driven by the point length dims the group consisted of the (Copy Curve, Points used for split and the two Trim Features)

Then I did a reference pattern for the thin feature and one for the Full Round feature used to create the ends of the slot.

View attachment 4129

Further explanation because of problems with patterning the point 10 times and choosing the same dimension to pattern by in second direction I created a single point feature with two points. If I used the use edge and referenced the sketch loop and split the use edge curve I would get a straight line and not arcs. By using the copy curve shown in group above after the split to get the red curve shown in pic.

Michael


Edited by: mjcole_ptc
 

Attachments

  • 2007-09-10_170804_et_slot_pattern_along_curve.jpg
    2007-09-10_170804_et_slot_pattern_along_curve.jpg
    47.2 KB · Views: 0
Therefore I used the patterned points on the curve reference to do two
split commands to remove the portion of the curve before the first
point and after the second.

whats that?
 
By any chance is that view in shaded mode? If it is check to see if the display of datum curves in shaded mode is enabled.

VIEW>DISPLAY SETTINGS>MODEL DISPLAY>SHADE>WITH DATUM CURVES

Come on, fess up on this...
smiley1.gif


andysuth said:
So it is. It is also just a random feature, not feature 7 which is the helix datum curve.


Feature 9 is probably an old feature that resembled a curve, so I had it hidden so it did not confuse the matter.


But I've here shown a layer tree with the hidden layer indeed showing nothing hidden.


-AS


View attachment 4130
 
Sorry if imiss cut shortsomeone else


Hey, mjcole_ptc !Is it seem you using an otherwaywith puppet 's modeling ?


Ijust understand a little because of the language fence problem and experience.


This 's myworking up to now !
smiley18.gif


View attachment 4131


Andhere is file i do on : 2007-09-11_001916_vd1.prt.zip


If you or puppet have free time, pleaseimprove it!


Thanks a lot
smiley9.gif
 
I went another way and Glenns layer tips sure helpedView attachment 4134
 
<DIV>How could you make it!?
smiley32.gif
</DIV>
<DIV>I'm really not good for pattern feature.
smiley9.gif
</DIV>
<DIV>Would you please help me to achieve?</DIV>
<DIV>Thanks in advanced
smiley1.gif
</DIV>
 
Wsylvester,
that way seems really convoluted :)
View attachment 4137

Would you believe I've never seen that curve trim ? care to share any details of it .
 
now i have to step it up a notch from elzar's spice weasel

View attachment 4138
 
Puppet,


I copy and paste my centerline sketch so I have it as a composite, then I hide the sketch so I make sure I always get the cc.


.... then new sketch ..offset the composite curve a radius either side.


sketch again the two circles ... center same as ratio points


Then add the 4 points intersection curve and circle. selection filter to geometry works better than smart


then pick one of the outer curves.. Edit>Trim


trim picks are point, curve, or plane... in this case I pick one of the intersecting points...... then it arrows as to which side you want to keep....


In this pic it's pretty straight forward ... on the H shaped part.... you have to adjust the offset curvesit back some value, perhaps based on a relation :-) so the offset curves are not closed... doesn't trim a closed curves...least not WF2


View attachment 4139,cut
 
Puppet ... hey it your fault I even messed with this
smiley36.gif


I got to playing with your example... never did seem to get the vss going correctly, guess I going to have to re-exam it ......did you add the end radius afterwards?


now is this new one vss with evalgraph ??


I thought we were suppose to pull your strings Puppet, not you ours
smiley29.gif
 
ahhh ...got to love those lil' options. where ever they may be
smiley2.gif


View attachment 4140..
 
hehe don't lie :) ur here cos ur a great and hepful guy.
Also u wanted to up-show me with that last pic.

Radius is there from the vss.
the grooves are done within the VSS with trajpar 1 for depth 1 for width.
 

Part and Inventory Search

Sponsor

Back
Top