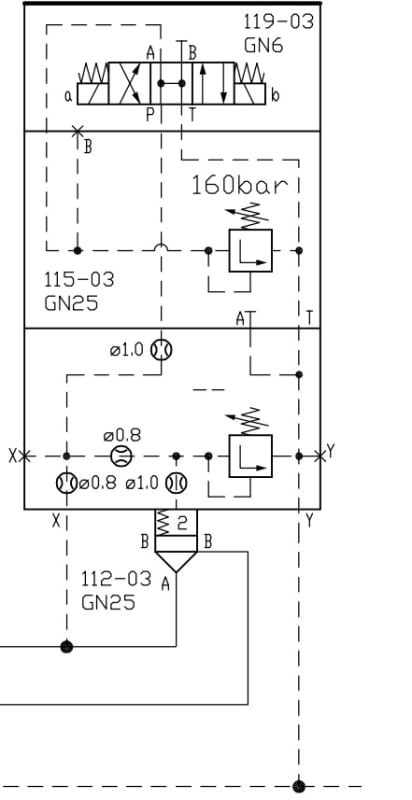
There seem to be a lot of A and B ports in the drawing. To be clear, I think we're talking about the ones at the bottom of the drawing (The Cartridge valve's A and B).
The way I read it, the valve is fed from the A port, and works to control pressure upstream on the A line by selectively dumping flow to B.
With the DCV deenergised, the top chamber on the cartridge is vented to tank through the open centre of the DCV (with supply pressure dropped across the 0.8 mm orifice that'sin line with the bottom X port. This will allow the poppet in the cartridge to lift, dumping the A port to B.
With coil a energised, all flow through the top two blocks of the stack ceases. Pressure on the top of the poppet is now controlled by the set pressure of the relief valve in the bottom of the stack, and the cartridge valve will lift sufficiently to dump enough flow from A to B to limit the pressure in the A line to a fixed value defined by the setting of that relief. I think this only makes sense if the relief in the bottom block is set to a higher pressure than 160 bar.
With coil b energised, the pressure at the top of the poppet is controlled to 160 bar (assuming that the relief in the bottom block is set to a higher value than that), limiting pressure in the A line to 160 bar.
So it looks like a solenoid operated pressure maintaining valve, with settings of a: a value adjustable above 160 bar, b: 160 bar and otherwise 0(ish) bar.
A.